You might have heard the news that Universal Analytics will be gone from June 2023. So you should upgrade to Google Analytics 4 as soon as you can, so you can have historical data even when the legacy GA will stop tracking.
‘Universal Analytics will no longer process new data in standard properties beginning 1 July 2023. Prepare now by setting up and switching over to a Google Analytics 4 property.’
In this Google Analytics tutorial, I’m going to show you how to upgrade to Google Analytics 4 from Universal Analytics and start tracking your website analytics data on GA4 as well.
Without further ado, let’s dive in.
Why you must switch over to Google Analytics 4?
Before we would show you the actual process of upgrading to Google Analytics 4 from Universal Analytics, I just want to emphasize why it is indispensable to upgrade to Google Analytics 4 tracking
Google Analytics’s now legacy version, Universal Analytics will stop processing data on websites starting from July 1 2023.
If you still want to use Google Analytics after July 1, 2023, you have to upgrade to Google Analytics 4.
If you hate Google Analytics 4 and don’t want to upgrade from Universal Analytics, then check out our guide on the best Google Analytics 4 alternatives here:
- Google Analytics Alternatives (Tobepublished)
Keep in mind that by upgrading to Google Analytics 4, you won’t delete your current Universal Analytics tracking from the website. Until June 2023, nothing will change.
You will still be able to track everything in your current legacy Google Analytics property, but the data in your Google Analytics 4 property.
In this tutorial, we are going to focus on the step-by-step process of upgrading and migrating to Google Analytics 4, if you want to learn more about how Google Analytics 4 works, or how it is different from Universal Analytics, check out the following tutorials:
- Google Analytics 4 vs Universal Analytics
- What is Google Analytics 4, How does it work?
How to upgrade to Google Analytics 4?
So if you have already been tracking your website with Universal Analytics (the legacy version of Google Analytics), then here is the steps of upgrading to Google Analytics:
- create a Google Analytics property in your Google Analytics account
- Get the measurement ID of the Google Analytics 4 property
- add the GA4 tracking with your preferred method. (here we are going to focus on Google Tag Manager installation).
- Migrate all the events, conversions (goals), filters, etc. you had in Universal Analytics
All right, so as you can see, there is nothing complex in this process, but let’s see the step by step implementation of all these steps.
1. Create a Google Analytics 4 Property in your Google Analytics
- Open your Google Analytics property that is tracking your existing Universal Analytics implementation
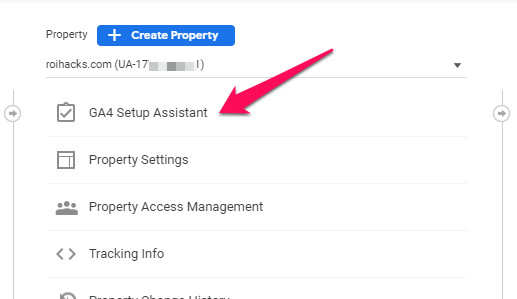
- Click on ‘Admin’ on the left.
- Under the ‘Property’ column, select ‘GA4 Setup Assistant’
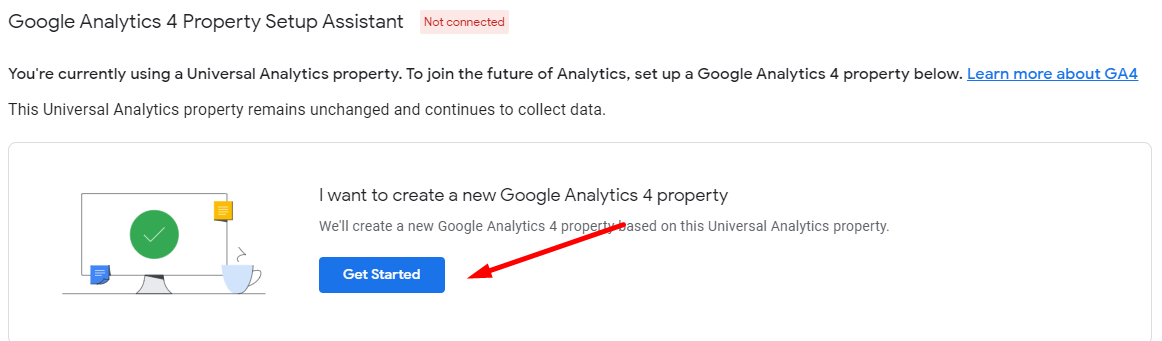
- Select ‘Get Started’
- Click on ‘Create Property’.
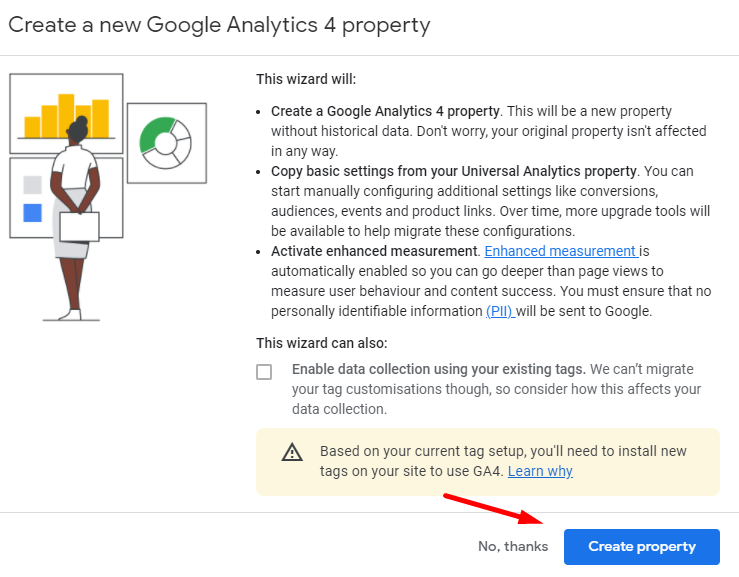
Now, Google will create a new Google Analytics 4 Property that is in the same account as our Universal Analytics property.
Also, you can see above, Google Analytics will try to import some basic GA setup and settings, but in my case, I couldn’t import Universal Analytics Tags to GA4, so I have to recreate new Google Analytics Tags in Google Tag Manager from scratch.
2. Get the Measurement ID of the Google Analytics 4 property
Now, we need to get the Google Analytics 4 property tracking code that is different from the UA tracking code and install it on our website.
If we don’t know, we should find out how our Universal Analytics tracking code was installed and use the same method with the GA4 installation.
If you have no idea, you can try to find your original installation method by checking out this article that discusses different installation methods of Google Analytics.
However, among digital analytics professionals, there is a consensus that the best way to set up Google Analytics and any other marketing or tracking analytics snippet is via Google Tag Manager or other similar tag management software.
So in the rest of this article, I am going to show you how to upgrade to Google Analytics 4 by installing the tracking code to Google Tag Manager.
So to continue from where we left off:
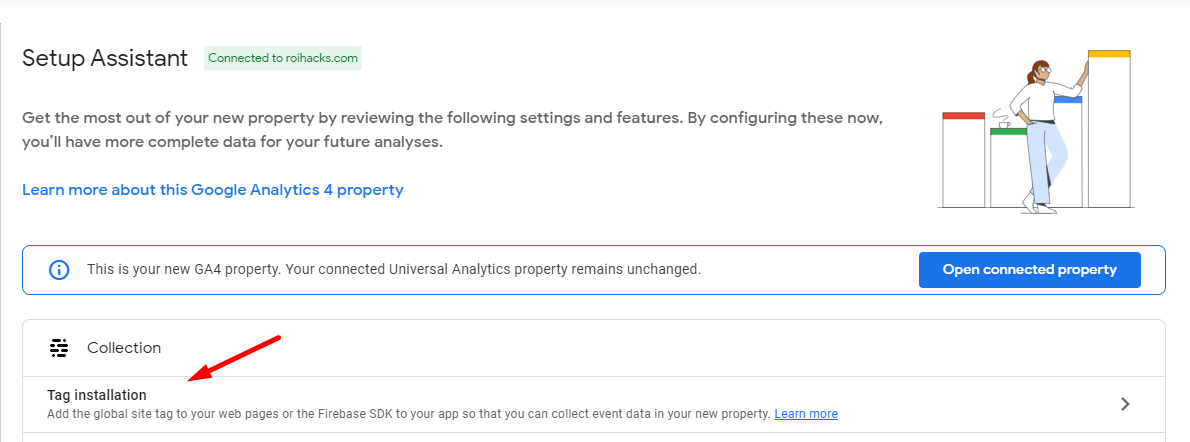
- Click on ‘See GA4 Property’.
- The GA4 property should be opened in a new tab.
- Click on the website data stream details.
- Here we can see the Measurement ID of our website’s GA4 property.
- Copy this Google Analytics 4 Measurement ID, so we can use it in Google Tag Manager.
This Measurement ID is necessary so the Google Tag Manager can inject the tracking code that will be able to track users on our website.
As you can also see, you can also modify the Enhanced Measurements settings here. We would generally not touch it in most cases.
All right, so we have the code, so now we can go over to Google Tag Manager and install Google Analytics 4 with GTM.
If you don’t have Google Tag Manager on the website or have it but have no idea how to use it, we would recommend reading the following tutorials:
- How to set up Google Tag Manager? (Tobepublished)
Upgrade to Google Analytics 4 With Google Tag Manager
All right, so all we need to do is to create a Google Analytics 4 Pageview tag on our website.
Here is what we have to do:
- Open Google the Google Tag Manager account and select the right GTM Container
- Click on ‘Tags’
- Click on ‘New’.
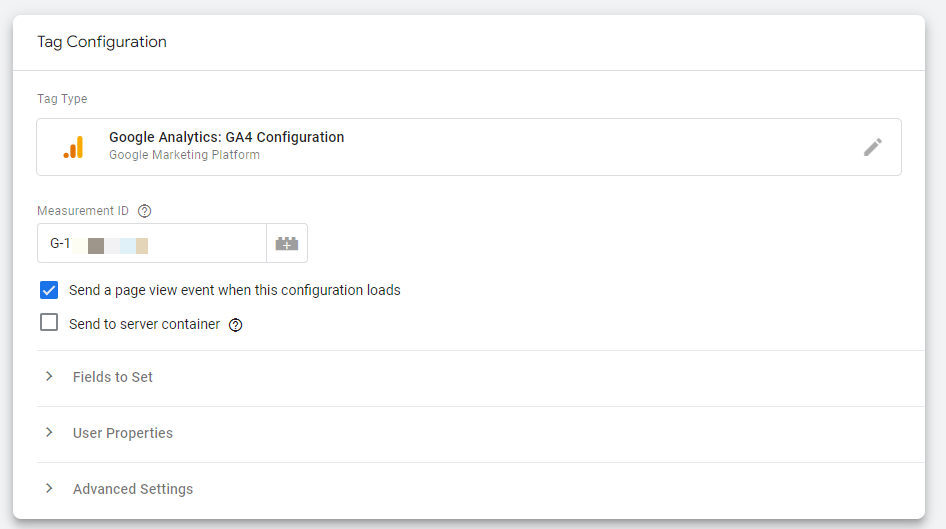
- Click into the ‘Tag Configuration’ box
- Select ‘Google Analytics: GA4 Configuration’
- Paste the Measurement ID we copied in the previous section.
- Add the All Pages Trigger to the Tag
- Click on ‘Save’ in the top right corner
You can check in the Preview and Debug mode if the installation is successful, otherwise, click on the ‘Submit’ button.
You can optionally add a version name and add a version description, then click on ‘Publish’ button. The workspace changes will go live and the Google Analytics 4 tracking code will be added to the website.
If you have done everything right, if you now visit your website and open the new Google Analytics 4 property, you should be able to see your session in the Real-time report of Google Analytics.
Congrats, you have successfully upgraded to Google Analytics 4.
Migrate Google Analytics Events, Goals and other settings to GA4
By installing the Google Analytics 4 tracking code we have made the most essential step of the upgrade process.
However, if we had a more complex setup, we were not only measuring Page
Thanks to the GA4 Enhanced Measurement, with the GA4 vanilla setup we can start seeing some interaction data without doing any kind of additional setup.
However, if you want to take your website measurement to the next level, and gather quality insights from your digital analytics reports, you also have to set up Google Analytics Events and Goals (now called Conversions in GA4.)
To learn more about how to set up these in Google Analytics 4, check out the following tutorials:
- Google Analytics 4 Events (Tobepublished)
- Google Analytics 4 Conversions (Tobepublished)